Rachel Sews Quilts

Stitching together, a celebration of crating, community and friendship.

If your last name is Tennant, Anderson, Hotchkiss, Densmore, DeAngelo, Grimes, Philips, Calabia, Leopere, Lando, Spielman, Moore or Cain-Rollings you will likely find familiar imagery in this book. An epic computer crash and time at home has provided the inspiration to catalog my quilt making mania.

Now is the time, if you are welcoming a new baby into the family contact me about creating a custom offering. I will stitch you a matching tiny keepsake from the same cloth as the splendid welcome quilt. You get a mini art momento to hold close while apart thank is a link to the full sized art quilt.

Click the photo to link to the book.

Additionally the “pitch in a patch” is still available for groups who wish to create a good luck, welcome, or make up a gift “from all of us”. Have everyone contribute cloth to mark a special occasion. See my book as it is full of ideas and examples of past work. Some quilts use photos, creative themes as narratives. Others are artistic visionary pieces built fro wild dreams and twist into previously unseen unforeseen directions.


Intermediate HikingDress

Maddy Workshops

Download the PDF instructions before the meeting ($4.99 on Etsy). For people who already know how to sew, come to experience the BodyFit Method.

Saturday December 19, 10:30 am PST
Saturday October 24, 10:30 am PST
https://zoom.us/j/2303940709 to join Zoom

The Maddy HikingDress
is comfortable as a nightshirt
yet looks put together and professional.
Born of T-shirts so it is easy care and
available in your favorite color(s). Learn this new approach to affordable and easy to manage style of town to trail dressing.

Prep Three T-shirts: Prewash 2 shirts of the same color and a
third T-Shirt for a contrasting accent. Choose the same weight in cotton knit to create your new favorite Hikingdress.

Options include:

  • Sleeveless or short sleeves (long sleeves can be formed with extra cloth) or pair with a sleeved base layer. 
  • Neckline options include a contrast facing, V neck, a turned edge may expand to include a face framing cowl.
  • Option of adding a shelf bra if using a facing.
  • Contrast band at the mid line can be placed high for an empire waist go low on the hipline, even softly curving to accentuate your shape.
  • The fit can be body skimming or a looser for a wide stride with a twirl friendly ruffle if you please. 

The Maddy dress is an intermediate project from the Hikingdress collection. Think of it as a blank canvas, Instructions that can be completed in a day if you are comfortable sewing on knits and have the supplies on hand. 

See you then.

beginners try the
Suzi

Beginner HikingDress Suzi Workshop

The Saturday 10/10/2020 Suzi HikingDress was a big success, and will be offered again soon. Email Rp@raychil.com to express interest in joining beginner level classes.
next in the lineup

https://raychil.comhikingdress-maddy-workshop/

Gather your Largest T-shirt, sewing supplies & download the PDF instructions before the meeting.

During the 90 minute session learn how to BodyFit for an up cycled fall dress or tunic.

Use a comfortable A line or choose a closer fitting shape to remake a favorite cotton T-shirt. This easily accessible beginner project features careful fitting and finishing to completa your Hikingdress or tunic in one day. You likely have all the supplies on hand you (if you sew).

Hope to see you there.

Sewing goes high tech

This week a laser cutter was used to cut ties for 300 PPE isolation gowns. Thanks to Sewing4good.org for keeping the domestic production of protective clothing for hospital workers flowing.

Rachel Sews PPE

Well like many people I have been gardening and sewing this spring. Both activities have gotten big and are keeping me sane.

The sewing started with masks for front line workers and friends. Now it has grown to over 200 produced since mid March. Gradually I saw a need to do even more, so I am committed to sewing isolation gowns for healthcare workers with Sewing4good.org

I am into my fourth week of the project and have started a campaign to raise money to support my workroom.

Never before have I done a campaign like this but I could use some support so that I can continue to sew for health care workers. Who knew home sewing could be so vital to the national recovery?

https://www.gofundme.com/f/rachel-sews?utm_medium=copy_link&utm_source=customer&utm_campaign=p_na+share-sheet&rcid=341821b8eb1f40789052b0fae0b624b4

Your contribution of five dollars would buy me a new serger cone of thread or package of 10 machine needles. Move the decimal point over one place and Kermit and I will be sending you a cloth mask in the color of your choice as a thank you.

Tote-a-go-go

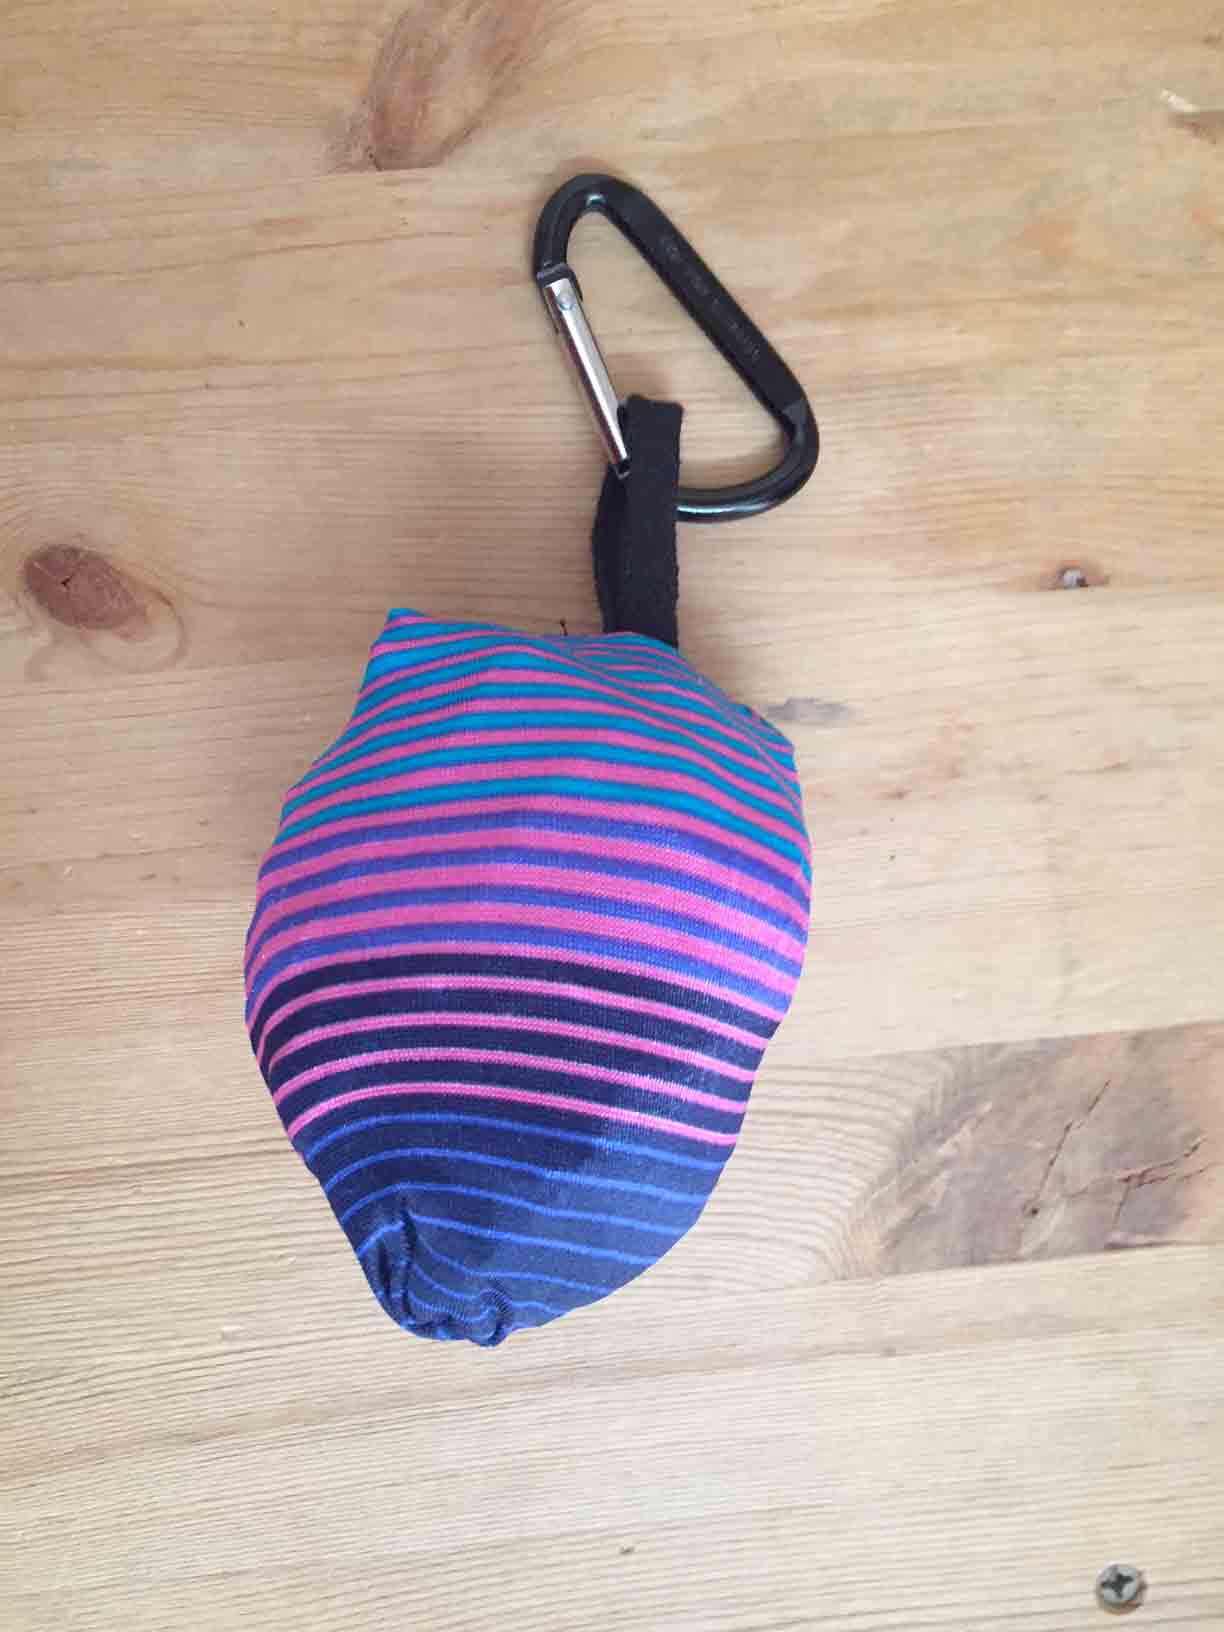
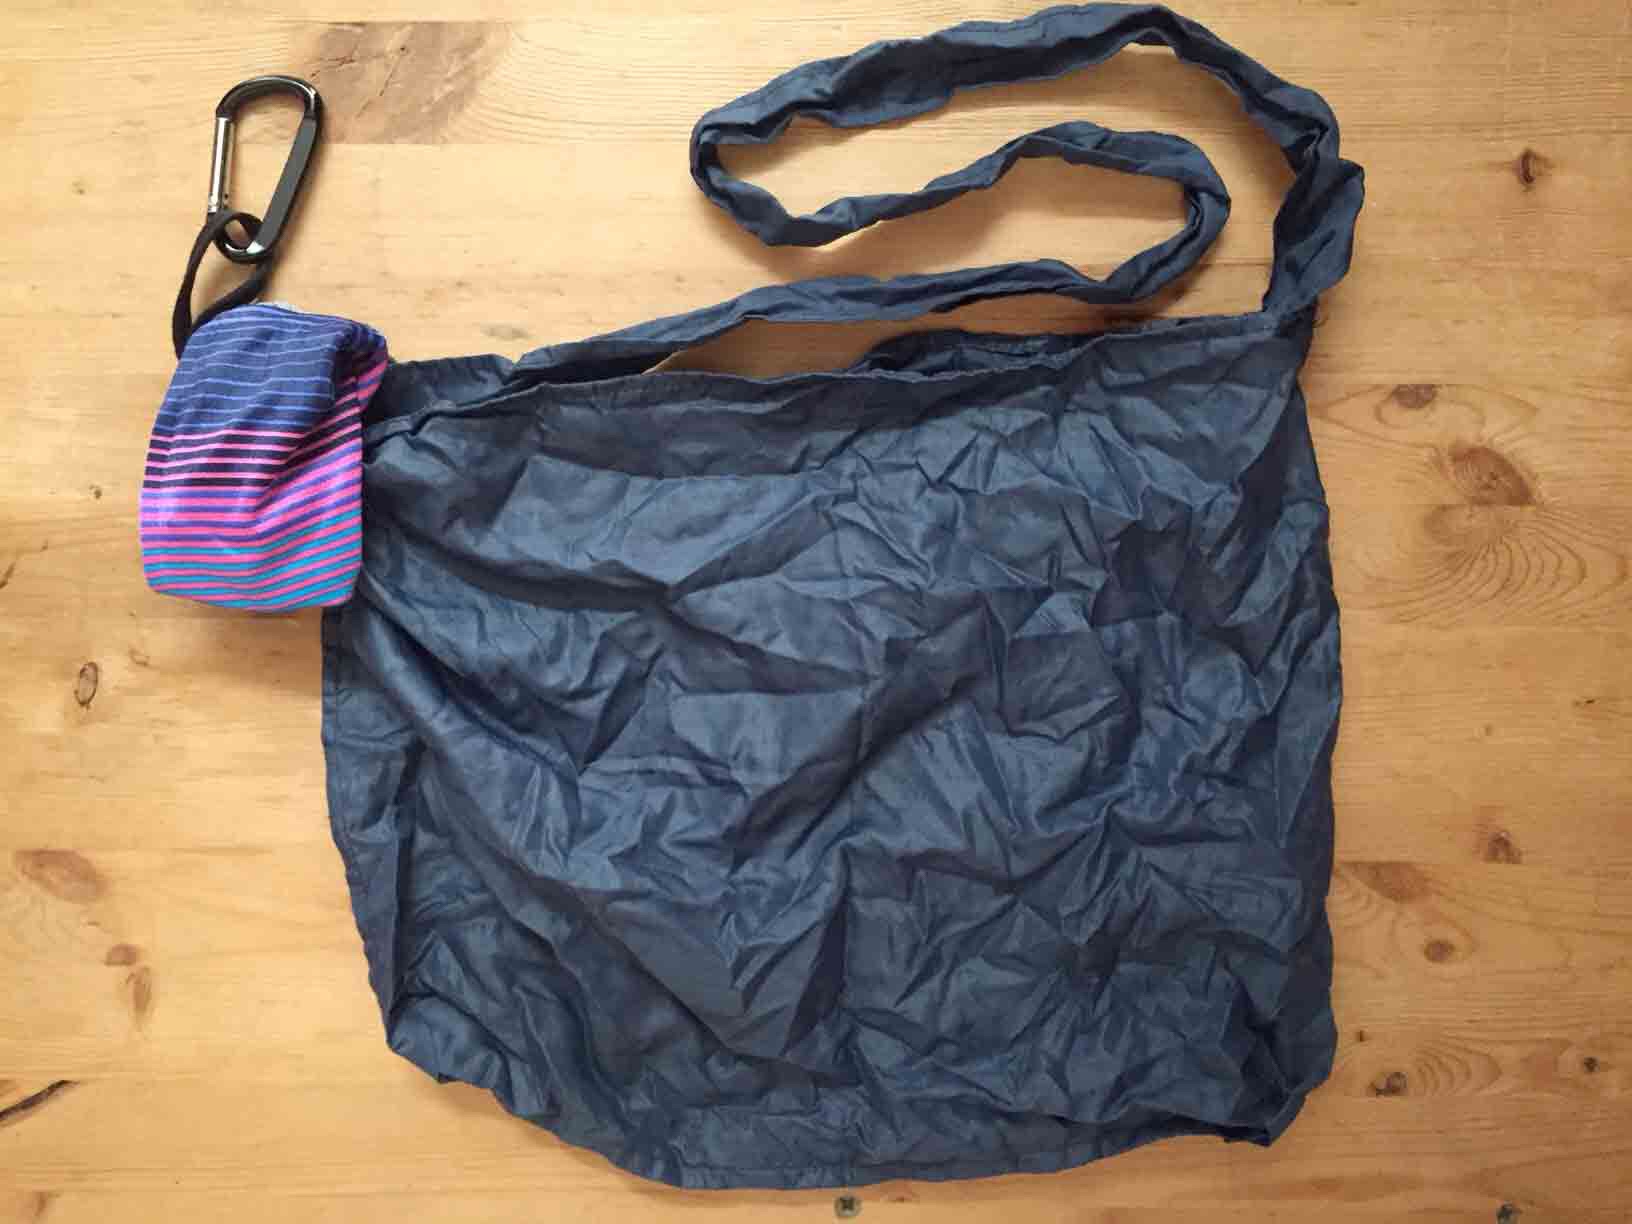
Today I am very pleased to share my new favorite hand made accessory. It is a compressed nylon bag that tucks into a tiny ball. I like and so cary it every day and so actually make good use of it.

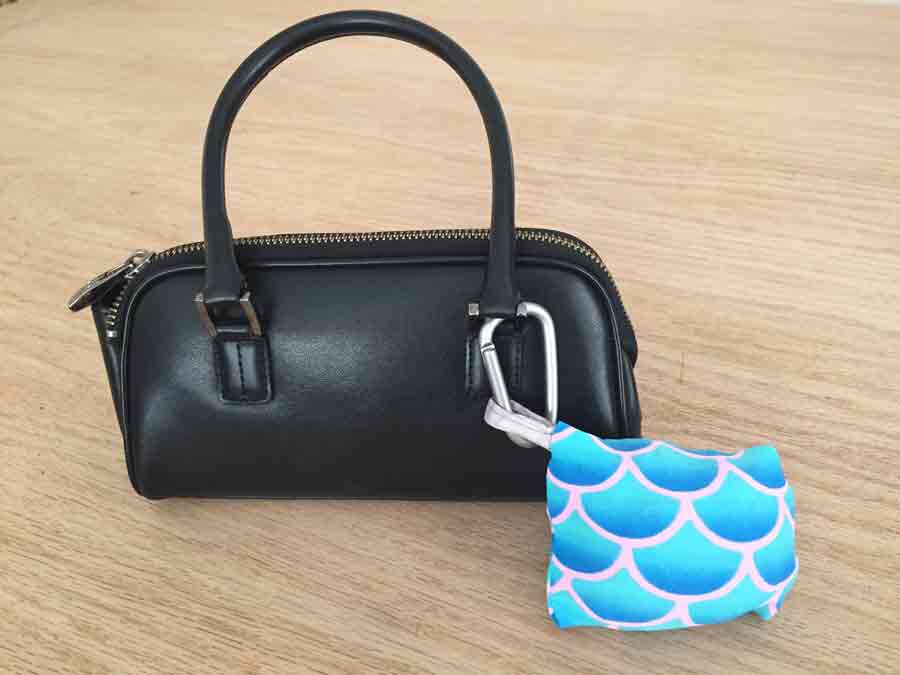
This is my own hand made nylon bag. You can buy similar bags but I prefer using found materials and customizing details like mermaid scales instead of flashing corporate logos.

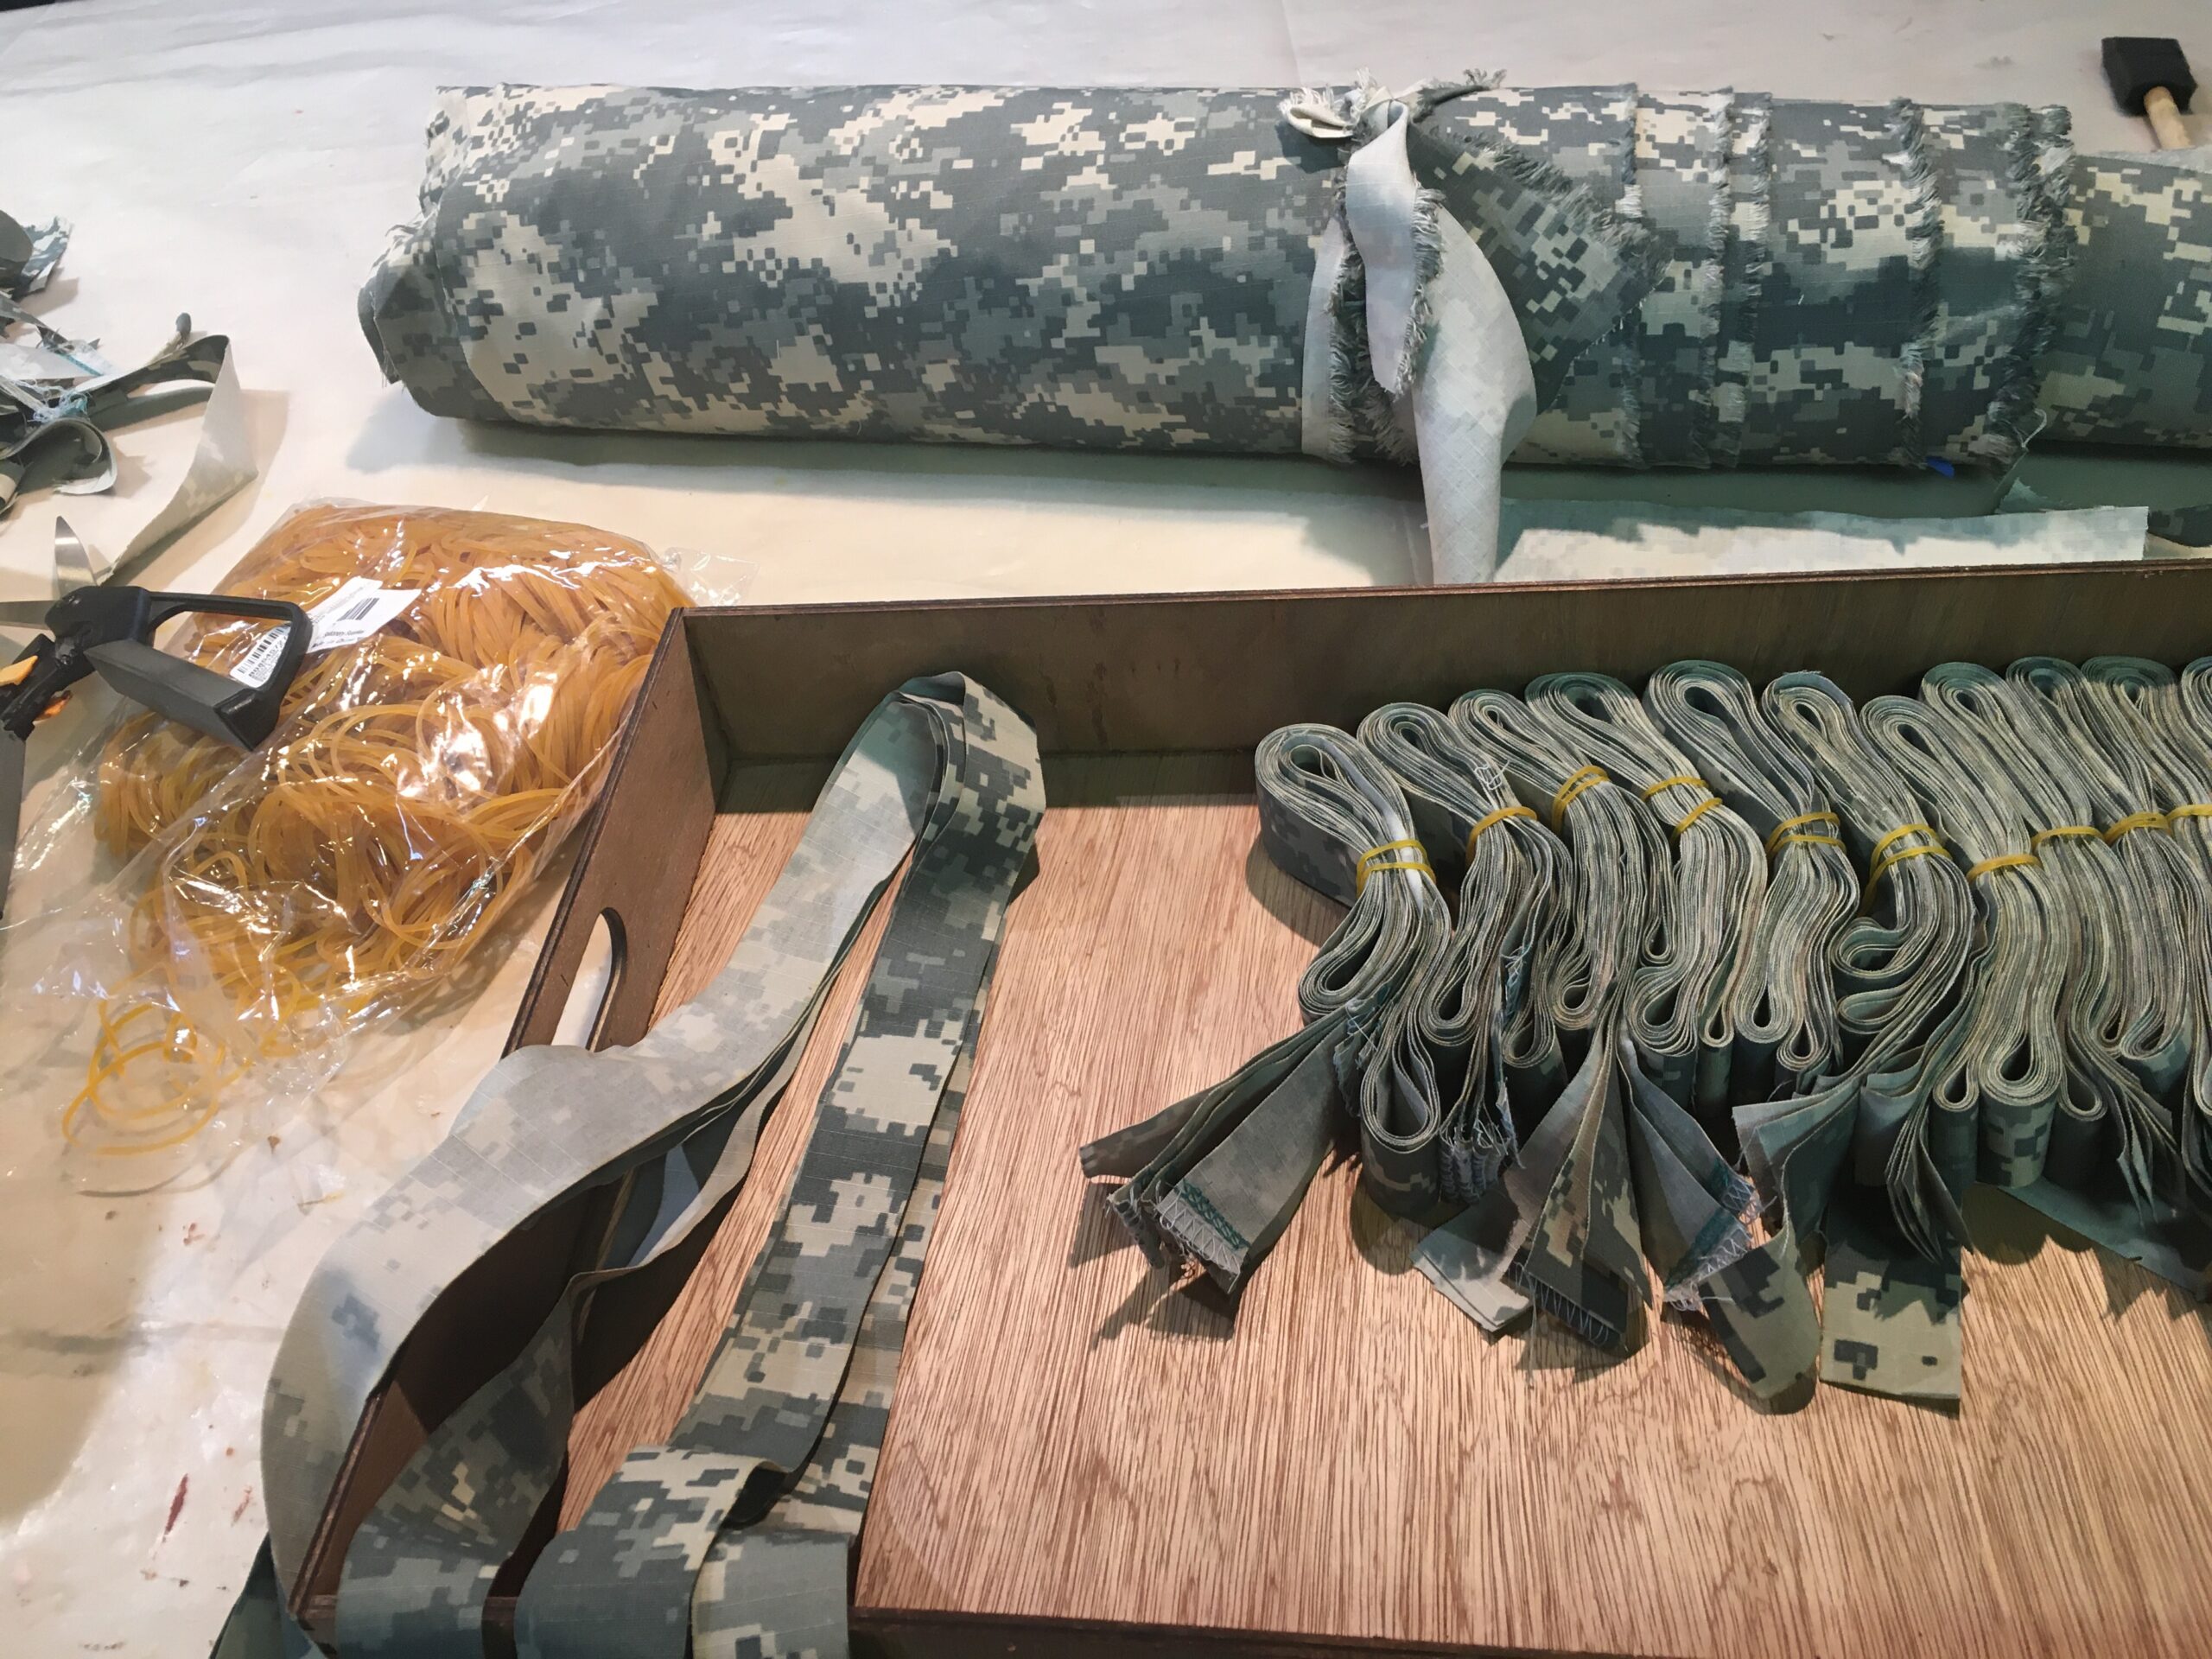
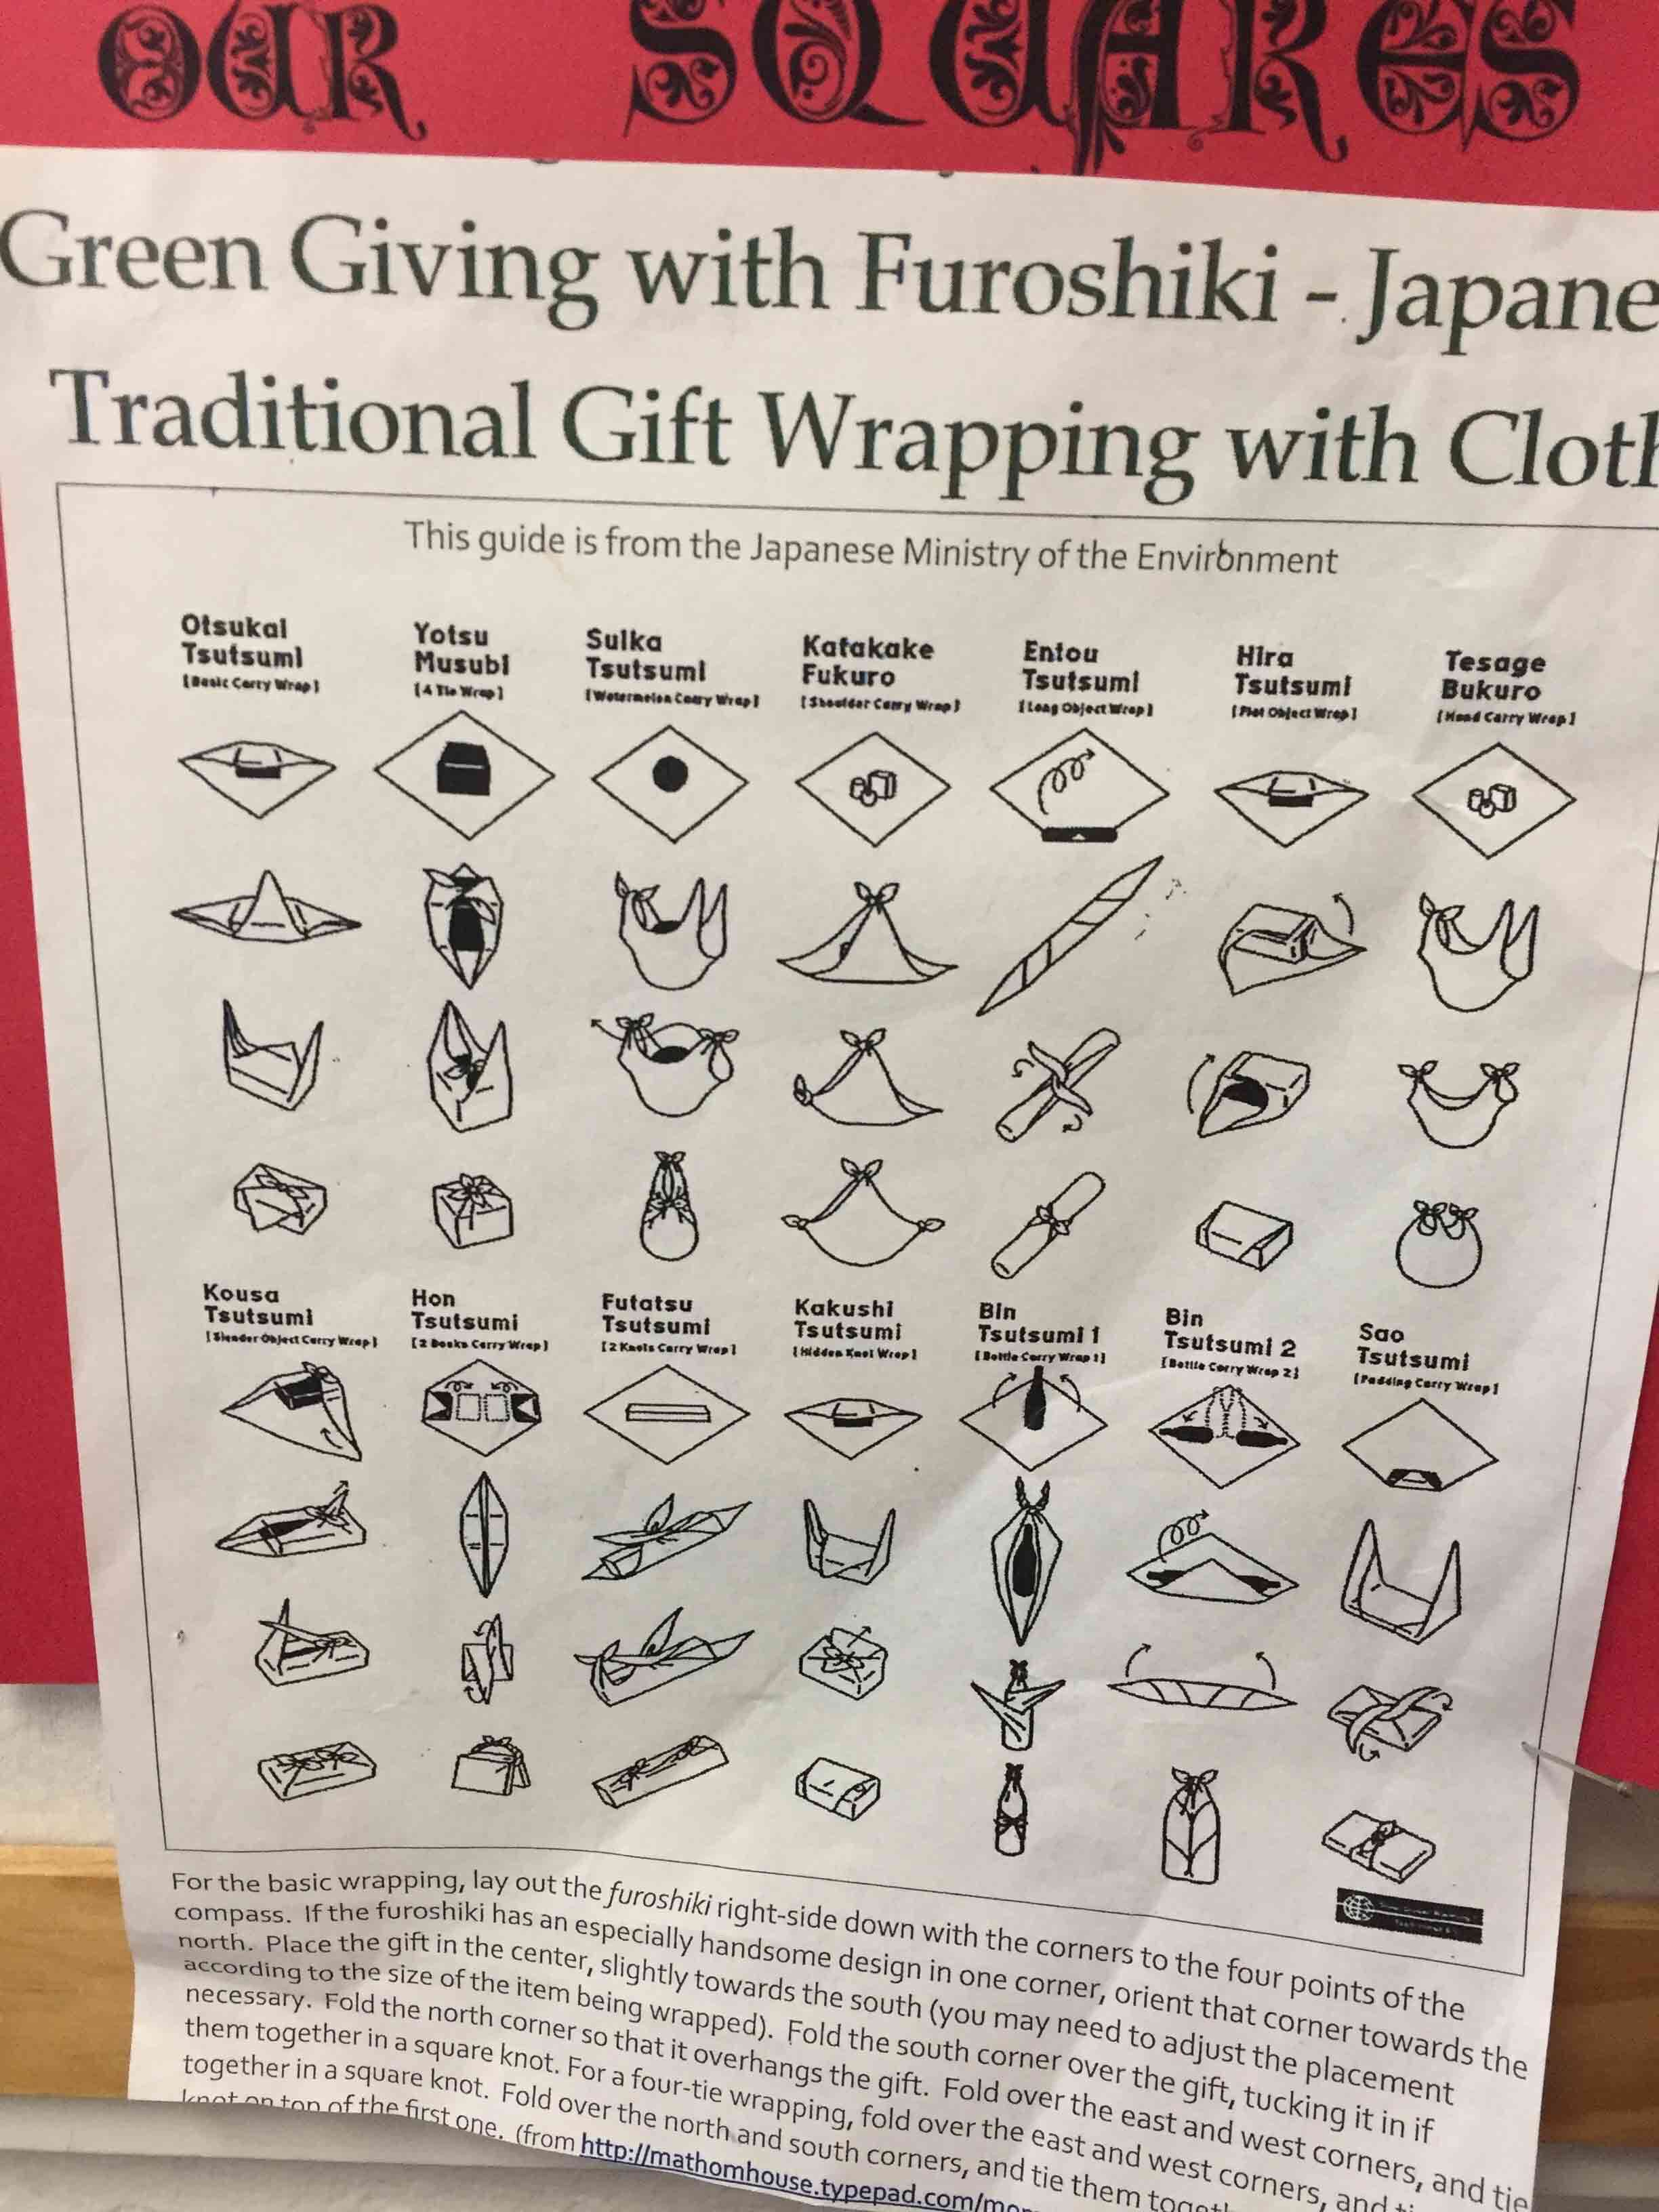
Get your supplies together (at Fabmo or find another spontaneous up cycling opportunity). Or you could wear a bandana and use traditional Japanese folk wisdom to tie a bag into shape without any further sewing required.

Tote-a-go-go Instructions

How to make a nylon shoulder bag that clips on and tucks away. Snap, click, tug and you are ready to load it with your stuff or new stuff.

Supply List

Sewing scissors

sewing thread

sewing machine

metal spring carabiner clip

woven trim about 1/2” x 6”

Fabric:

4 way stretch (swim suit fabric) 9″ x 5″ approximately

rip stop nylon or other light weight sturdy cloth 1/2 yard of (18” x 42”).

Cut Two squares of 14 ” or fold a long rectangle 14” x 28″, and a strap, cut a rectangle of 4” x  42” (or shorter or wider can work)
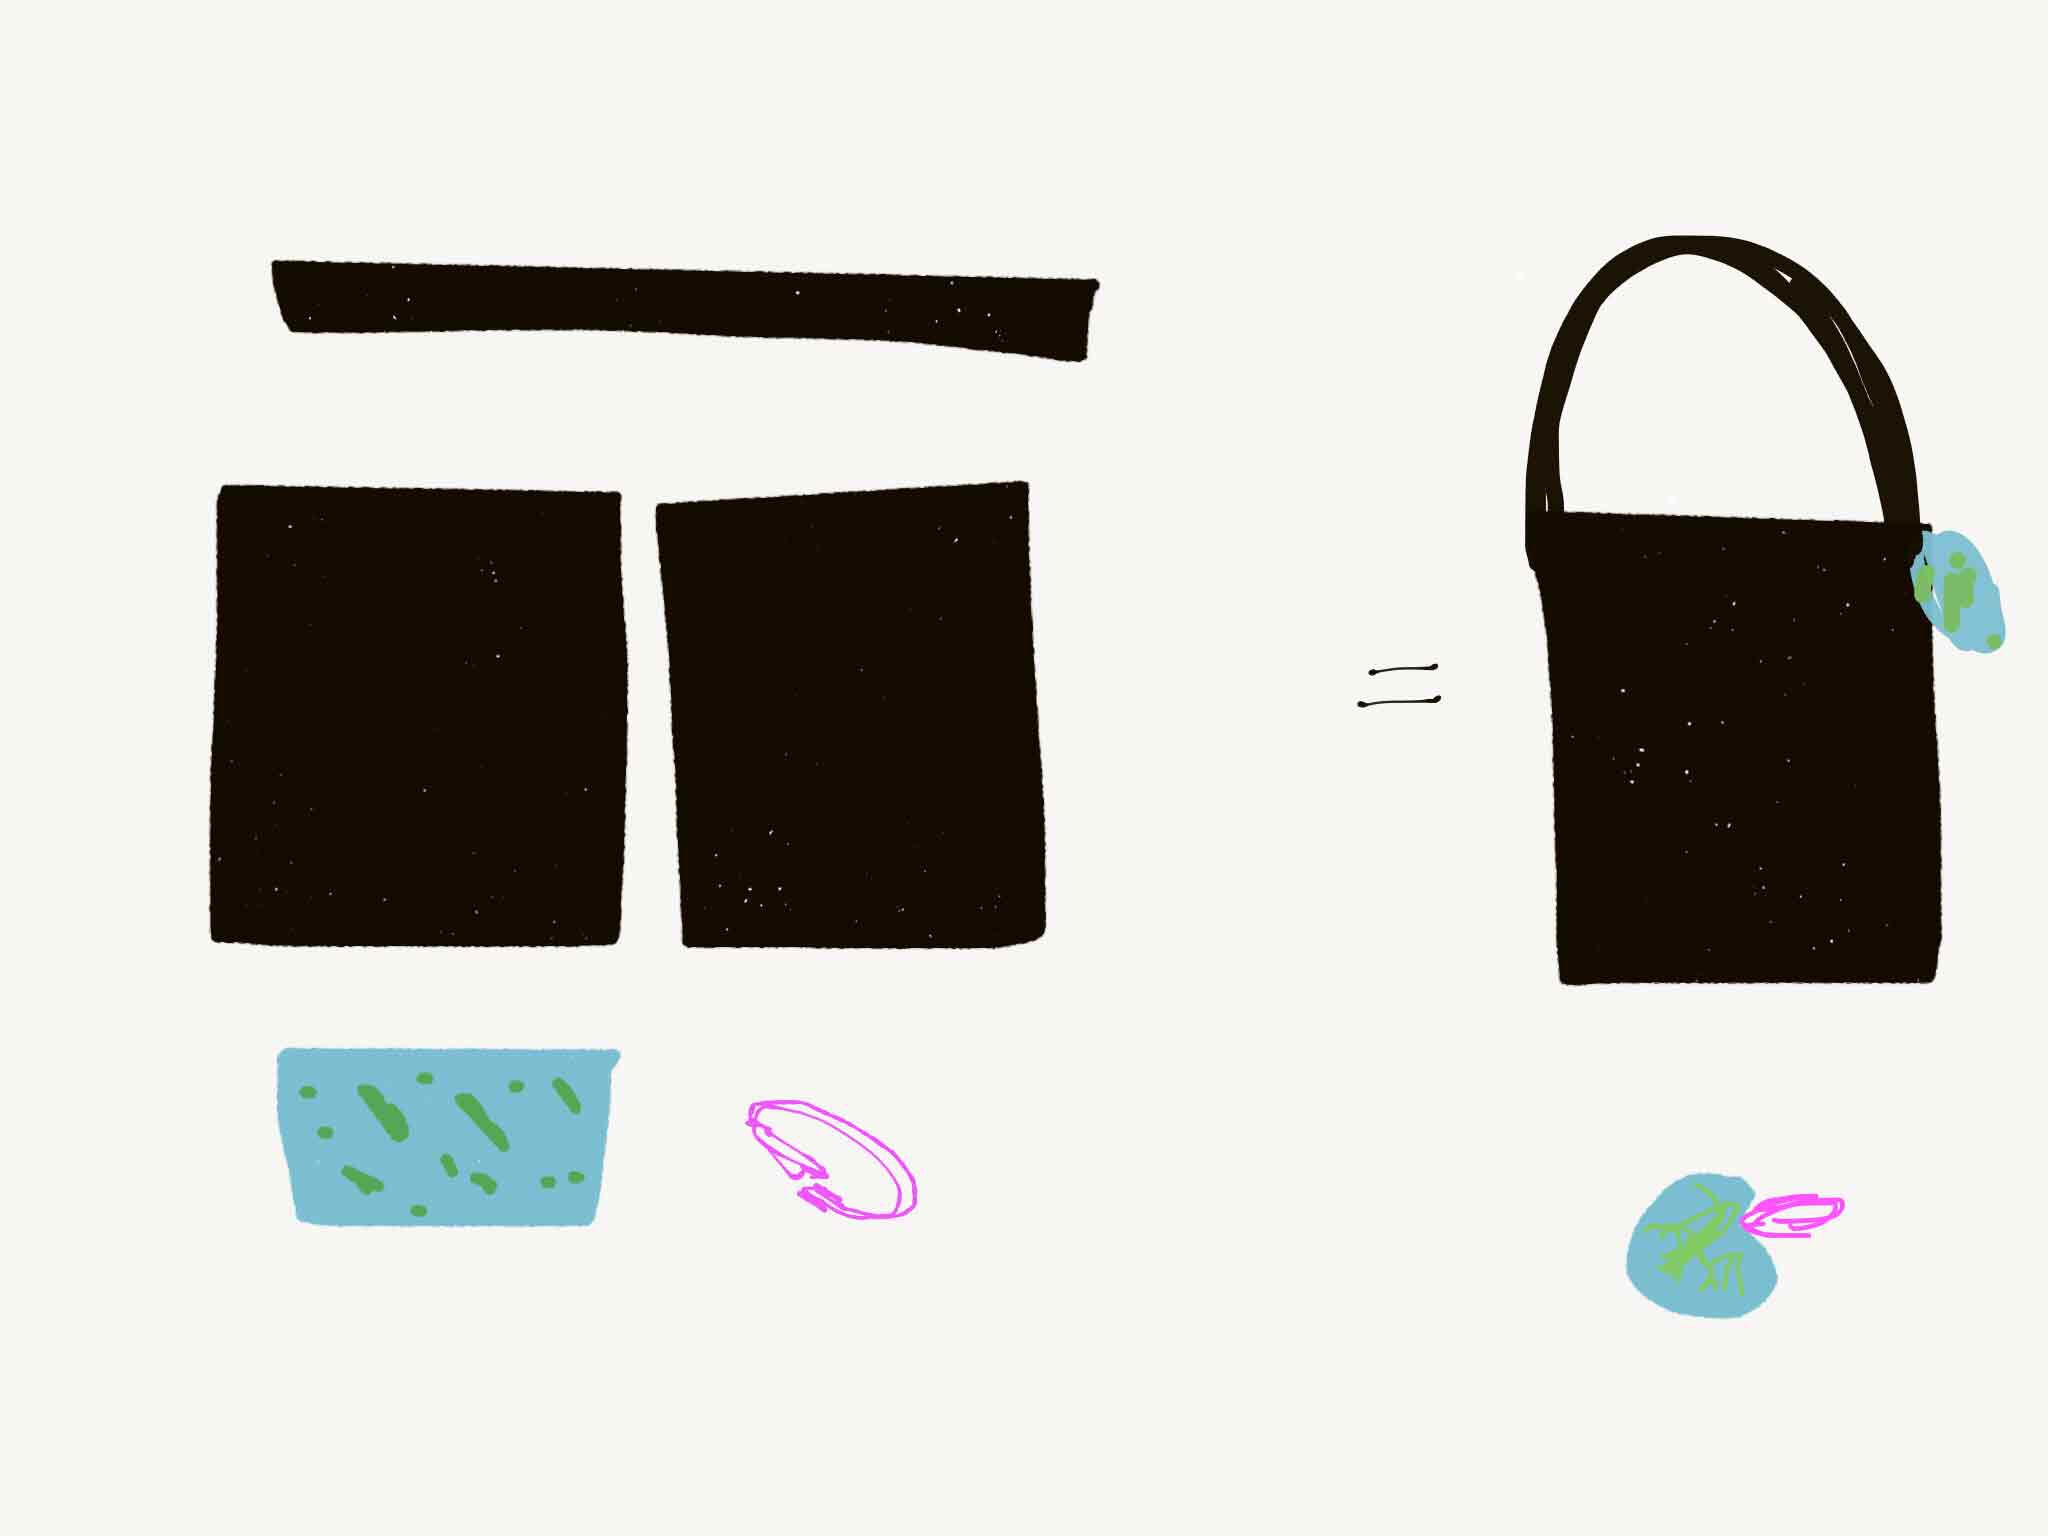
Construction

For the strap; the long rectangle of 4” x  42” nylon is folded right side facing IN. Stitch the long edge closed. Hand finish turning so the right side is facing OUT. Guide a safety pin through the tube to speed this along. Tuck in ends with a small 1/2 turn to make a seam allowance for strap attachment later.

French seams are the recommended method of construction to create a sealed edge seam that encases raw edges and prevent unraveling. If you have never used this method before you can watch a quick video for support. How to sew French Seams

Assembly

Place the nylon squares or rectangle so that right sides face OUT. First pass, the sides are stitched with a narrow seam allowance. Trim it down to 1/4″ outside of the stitch line.

Next turn the bag so wrong sides face OUT. Second pass, stitch the sides a second time encasing the previous seam and cut edge.

Turn bag right side out, hem the top of the bag turning the top down two 1/2 inch turns, stitch to finish.

Pin the strap to sides. Use the hem and side seam as the attachment zone. Put the bag on your shoulder to test the strap length.

Anchor the strap to the INSIDE of the bag. Reinforce with a square of stitches nearly as wide as the strap. Sew an x pattern inside the square of reinforced stitches as is used to attach a webbing strap in a commercial heavy weight nylon tote bag.

Prepare the stretch pouch by finishing the short ends making narrow finished hems on two 5″ edges.

Fold the cloth into thirds like a letter with the fabric print on the inside. Under two folded narrow hemmed flaps tuck the woven trim, bent in half to form a loop. The cut ends of trim stick out as the loop is pinned onto the seam line.

Pin shut the other end. Baste the ends closed with a curved stitch line to create a rounded circular pouch effect.

Turn pouch right side out to test the fit before finalizing with tighter stitches. Snug the pouch over the compressed nylon bag to form tight a ball shape. Adjust the pouch size if need before finishing seams and trimming off any excess stretch fabric.

Secure the stretch pouch to an interior side seam. Place it two inches down from the top of the bag just below the strap attachment.

Turn stretch pouch right side out and stuff the tote. Slide the metal spring clip through the trim loop to complete. Enjoy, perhaps make a second one as a gift.

Thoughts on Father’s Day

So like many people my father is no longer alive. This year as Father’s Day approaches and I notice many glossy advertisements for appropriate mid June gifts. I smile and know he never liked most of the items rounded up for these occasions. For example we saw pictures in the newspaper advertising bracelets for men. Dad was outraged that such emasculating frippery was being pushed forward as a great gift idea.

John D. Philips would have preferred an outing like a trail hike or a trip to the camping store then to having something engraved at Tiffany’s to put in his pocket or on top of his desk. In honor of Father’s Day this year I propose reflection upon existing collections of things either from your dad or for your dad that he really appreciates.

Pictured above an old ax is given new life with a handcrafted leather sheath. Custom cut from scraps of heavy saddle leather, glued, riveted and a snap closure protect the blade while not in use. It makes it safer to handle, toss into the car or stash in a bag than if it did not have that sheath.

On that note I also made some sturdy draw string canvas bags. Nothing too original a very old sack of an idea that works well for keeping stuff tidy even on the go in the trunk of the car.

I stitched a layer of medium weight leather around the top of a 17″ wide by 20″ high sack. This version has metal grommets to reinforce the drawstring. Burning the ends of a nylon rope as my camping loving family taught the line glides threw. Next tie a square knot to join the ends and tote your bulky stuff with ease.

Canadian grandpas’ fishing knife has a trim sheath with a handy belt loop attachment. Just looking at photos of this old tool your hand can imagine how it would feel to handle it. While I never met the owner interacting with it conjures him up for me.

Hope your memories of family bring you something useful to work with. Heading towards shopping? Why not opt for experiences and sharing some time together over augmenting piles of stuff? Enjoy these last sweet days of May.

Japanese Apron by way of Santa Fe

Last week I had the pleasure of visiting Santa Fe NM with my mom. We wanted to see the local Folk Art museum and galleries for a few days before the summer season brings more tourists. We had the pleasure of staying at the Inn on the Alameda. It was quite convenient and charming. I especially enjoyed meeting Lisa the chef and checking out her cool apron. She was kind enough to let me trace it and make a copy. Here it is.
It is a very simple design, with three button side closure, finished edges with bias tape for long wear, busy but not nuts, looks great on and even has two pockets. I made it up in 100% cotton icot fabric in browns. It came out very nicely and I plan to make a few more. It looks good enough to wear around town as well as in project mode in the kitchen and beyond.

If you love it you can have it if you act now.
Raychil’s Apron

Sewing with Circuits


Sewing with circuits 
Over the years I have used EL wire and LIly Twinkle products to get some glowing light into my sewn creations. This year I have been introduced to using the raw LED lights directly with conductive thread and hand made coin cel battery holders for a DIY approach that makes the work even more affordable and flexible. Using an LED, a 3V coin cell battery and a metal bell on a conductive thread a negitive power supply form the battery can make a smiple tilt switch that light up when it hits a negitively charged bit of conductive fabric.  Rather than buy lots of switches and fixed parts I want to learn to make my own to be appropriate to conditions and cost constraints. 

Using  pliers I learned (from the We Are Three, circuit sisters of FabMo) to custom bend the LED for easy identification and to catch into sewn stitches.

positive bends into a  spiral 
negative bends into a triangle

This has been a fun and with some further research I found a nice little project
Tilt demo module, involving a jingle bell as a switch to turn on several LEDs. 

First cut from conductive fabric a battery pocket (on black) I found it has too much surface area and is at risk of shorting out. Next I drew up a simple shape and laser cut a from card stock a coin cel holder for the 3 volts to be safe and not have to use the tiny needles sizes the traditional holders require. 

The original is design is a neat project that I have simplified to fit in to a one hour session for a high school art class this week. It is my hope that everyone will be glowing by the end of the session and they like the idea of building a tilt switch as much as I do.